 Hide Table of Contents
 Tutorials
 About the API
 Work with the API
 Graphics and feature layers
 Popups and Info Windows
 Geoprocessor
 Operations Dashboard
 Create extensions
 Mobile
 ArcGIS Server Services
 References
 What's New archive
In this tutorial, you'll build a sample application that uses the ArcGIS API for Javascript to build an application that displays a web map from ArcGIS.com.
This tutorial shows you how to:
- Build a Web Map on ArcGIS.com
- Create a Map App from your ArcGIS.com Web Map
- Add a Legend to the Map App
Before you begin, if you are new to the ArcGIS API for JavaScript, please read our Setting up a Development Environment topic which covers prerequisites such as setting up a web server and using various IDEs and text editors.
-
Build a web map
The ArcGIS.com Map Viewer allows you to quickly and easily create and share web maps that tell interesting stories about your data. They may explain where people are buying homes, where sea surface temperature is changing, or where elephants migrate in the summer. These maps share information not just data.
Web maps typically display a map service with operational data (such as available stands of timber) on top of a map service with reference information (such as imagery or a shaded relief map). Sometimes a reference map service that contains boundaries or labels is placed on top of the other layers to create a "map sandwich": two reference layers with the "meat", or operational data, in between. To build a web map visit the Create a map tutorial.
After creating the web map copy the web map id for use in the rest of this tutorial. To find the id, view your web map in ArcGIS.com and notice that the URL includes the unique map identifier.

-
Create a Map App from your ArcGIS.com Web Map
The following steps will allow your application to access to an ArcGIS.com Web Map. The first step is to open the tutorial sample in the sandbox and replace the code in the source section with the code below:
<!DOCTYPE html>
<html>
<head>
<title>Create a Web Map</title>
<meta http-equiv="Content-Type" content="text/html; charset=utf-8">
<meta http-equiv="X-UA-Compatible" content="IE=edge">

<link rel="stylesheet" type="text/css" href="https://js.arcgis.com/3.26/esri/css/esri.css">
<style>
  html,body,#mapDiv,.map.container{
    padding:0;
    margin:0;
    height:100%;
  }
</style>

<script>var dojoConfig = { parseOnLoad:true };</script>
<script src="https://js.arcgis.com/3.26compact/"></script>
<script>
  var map;
  require(["esri/map", "dojo/domReady!"], function(Map){

  });
</script>
</head>

<body>
  <div id="mapDiv"></div>
</body>
</html>
If this code is new to you visit the Create your First Application help topic for details.
Next we'll add the
"esri/arcgis/utils"module to ourrequirelist. This will provide us access to the"esri/arcgis/utils"::createMapmethod. Add the following code to the sandbox application.require([ "esri/map", "esri/arcgis/utils", "dojo/domReady!" ], function(Map, arcgisUtils){ });
Now you are ready to use the
createMapmethod. This method takes a web map id and optional map parameters and creates a map based on the web map content. Any symbology, popups, layer visibility etc that you defined in your web map will be honored by the map.If you haven't created a web map yet, you can use
1a40fa5cc1ab4569b79f45444d728067for testing.
require([
  "esri/map",
  "esri/arcgis/utils",
  "dojo/domReady!"
  ], function(Map, arcgisUtils){
  arcgisUtils.createMap(<<Web Map Id>>, "mapDiv").then(function (response) {
      map = response.map;
  });
});
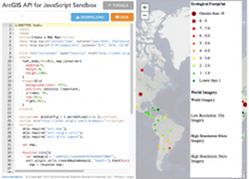
Run the application and note that the web map from ArcGIS.com is displayed. The map displays with the symbology and popup information you defined in ArcGIS.com.
To access a web map from a portal outside of ArcGIS Online, reference the
arcgisUrlproperty and set the path to your portal URL before calling thecreateMap()method:
arcgisUtils.arcgisUrl = "http://pathto/portal/sharing/content/items"; -
Add a legend
Let's try to add a legend to the test application.
Starting at version 3.4, you can quickly add a legend to the application using the
"esri/arcgis/utils"::getLegendLayersmethod. This method accepts the response fromcreateMapand builds an array oflayerInfosthat can be passed into theLegendconstructor. The method takes into account the visibility settings for the layers and the output array will not contain the basemap.Add a div to the
htmlsection of the application below the existing map div. This div will hold our legend widget.<div id="mapDiv"></div> <div id="legendDiv"></div>Add css to position the legend in the upper right corner of the map.
html,body,#mapDiv,.map.container{
  padding:0;
  margin:0;
  height:100%;
}
#legendDiv{
  background-color: #fff;
  position: absolute !important;
  z-index: 99;
  top:10px;
  right:20px;
}
Next, we add the code that loads the Legend widget.
require([
  "esri/map",
  "esri/arcgis/utils",
  "esri/dijit/Legend",
  "dojo/domReady!"], function (Map, arcgisUtils, Legend) {
Then, use the
getLegendLayersmethod to build an array of legend layers. Finally, we pass the output of that function to the Legend widget as thelayerInfosconstructor option to limit the legend to just the operational layers.arcgisUtils.createMap("1a40fa5cc1ab4569b79f45444d728067", "mapDiv").then(function (response) { map = response.map; var legend = new Legend({ map: map, layerInfos:(arcgisUtils.getLegendLayers(response)) }, "legendDiv"); legend.startup(); });Now, when you run the application, the legend should display in the upper right corner of the map.
For more details on working with web maps from the ArcGIS API for Javascript or working with the web application templates view the ArcGIS.com web maps help topic for details.
